Saturday, October 31, 2009

Omnomnomnom! Vampire Bite Cupcakes!

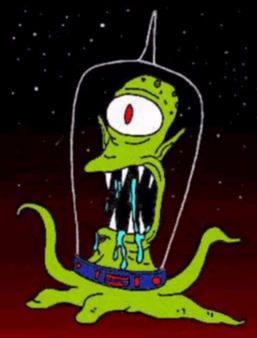
Ahh, we come to part two of Halloween party cupcakes. Yesterday it was Kodos and Kang. Today it's vampires! I'd like to start off this post with a disclaimer. These cupcakes have nothing to do with Twilight. Nothing. At all. And it can be verified. How? Because if they did, they'd look like this. But instead they look like this:


As you can see they are cool and not lame and sparkly and sexless. And what's even cooler about them is that they not only looked like they've been bitten into by a vampire, but they bleed when you bite into 'em. Thus, they are cool, not twilighty and totally worth making. So, how does one go about making these ultra cool vamp cakes? Like this.

First gather up: ingredients for your favourite cake; 1 can of vanilla, white chocolate or cream cheese frosting; 1 can of cherry pie filling; a small spoon and; a skewer.

Now prepare your favourite cake, in cupcake form, according to it's recipe / mix. Let cupcakes cool, unless you wanna burn your hands, and then by all means, trudge forward as soon as you pull those suckers out tha oven. Take your little spoon and hollow out a cavern in the cupcake.


Spoon in a nice dollop of the pie filling. If you want your cupcakes to really look like they are bleeding puree the pie filling first. But if you're like me and prefer to bite into a scrumptious cherry more than you prefer the visual effect of a bleeding cupcake, then don't bother with pureeing it.


Repeat this process with all your cupcakes. Once you have them all filled, freeze them. Yep, that's right, freeze 'em.


Why? Because if you don't then the pie filling is going to mix in with the frosting and you're just going to end up with a pink frosted cupcake. If you're going for a Twilight theme, you may want this. Otherwise, make sure you freeze them so the pie filling is a hard frozen clump that can't mix in with your frosting.

After your cupcakes are sufficiently frozen (I let mine go overnight, but I'm sure leaving them in the freezer that long isn't necessary) frost them. Nothing special here, just smear white frosting all over the top.

When you've got them frosted get a skewer and your pie filling. Dip the skewer in the pie filling then stab a hole in your cupcake.


Make sure you leave the hole visible. This makes it look more like a fang bite rather than just a red blob. Repeat this process for the 2nd fang mark. Now, redip your skewer in the pie filling. Streak a little extra filling down from the bite holes to make it look like the cake bled.


This should leave you with a final product that looks like this:


Sweet! Now you're ready to devour them like you're Louis and they're rats! Nomnomnom.

Friday, October 30, 2009

Kodos and Kang Cupcakes!!

If you don't remember or don't know who Kodos and Kang are you fail at life. Kang and Kodos are 7 feet tall, continuously drooling, evil, tentacled, cycloptic aliens from the planet Rigel 7. More importantly, Kang and Kodos are Halloween staples. They show up in every Treehouse of Horror (i.e. Simpson's Halloween episode). Thus after 19 years of showing up at halloween I think they have earned status as a Halloween staple. As such, they deserve homage. And what better way than to pay homage to someone than to make a tray full of sugary, floury likenesses of them (Just ask L'il Wayne and Alec Balwdin's daughter).


So why not whip up a big ol batch of Kodos and Kang Cupcakes? Because you don't know how, you say? Pssht. Easy Peasy. Just look and listen.

First, here's a list of things you will need: ingredients for your favorite white or light colored cake; 1 can of vanilla, white chocolate or cream cheese frosting, approximately 8 full size green airheads, 1 tub of mini fruit slices, black decorator icing or squeezable chocolate candy filling.

Now you're ready to really do stuff. So put together the ingredients of your favourite white or light colored cake (no cake racism intended) or rock a cake mix. Before you start mixing it up add in 25 drops of neon green and 2 drops of neon blue food color. Mix it all up.


Pour into cupcake papers and bake according to recipe / package. When they're done pull 'em out and let them cool. When they're cool you're ready to start decorating. This is where it gets interesting. First, for optimum results turn on House of 1000 Corpses in the background.

Next, spoon out two or three big ol' clops of canned vanilla (or cream cheese) frosting. Add 15 drops of neon green and 1 drop of neon blue food coloring. Mix it all up. Slather it all over your cooled cupcakes. Then you're ready to start the hard work. Get out your airheads and cut them into little strips. If you're using full sized airheads you may want to cut them in half horizontally first.


Cutting airheads is a tricky endeavor. As you can see I am hardcore and used a razor blade (that's right, I keep 'em handy, so don't mess with me). If you have a good pair of kitchen shears that don't have e. coli all over them they'd probably work well, too. Your average steak knife, on the other hand, does not.

Once you get some airhead strips cut, it's time to turn them into tentacles. Curl them around and generally make them look tentacley. Remember tentacles curl and wrap around stuff. So, if you don't do anything with them Kodos and Kang will end up looking more like green spiders or Cthulhu with two off center mouths. You don't want that. Once you've got cool looking tentacles shaped out of the airhead strips insert four into each side of the cupcake. It's totally cool and perhaps even recommended to let some lay over others.

Now, Kodos and Kang need eyes because eyeless cyclopses are totally lame. Take one of those mini fruit slices, preferably in yellow or red and draw a pupil on it with your black icing or chocolate candy filling, like so:


Cool. Now you have an eye. Stick it in the middle and towards the front of your cupcake. And guess what, when you've done that, you have a complete Kodos or Kang.


Tada! Now that wasn't so hard, was it? Nope. And now you've got the coolest Halloween cupcakes of anyone you know. Guaranteed. Unless you're friends with this chick.


Wednesday, October 28, 2009

Kat's Amazingly Awesome Apple Cider


Whoah-ho-hoah! It's two updates in two days! Try not to mess yourself with excitement.

And that, my friends, will be really hard to do given a. that It's Halloween week and I'm prepping all kinds of festive foods / drinks, so there might just be three or four posts in a row and b. the amazing awesomeness of this post. Yeah, no seriously it's epic.

How many times has someone promised to reveal "the Great Secret" that will bring you Wealth, Health, Power and Love? Ultimate Happiness? The key to wisdom and beauty and generally being a pimp? The answer to all of life's little questions?

Just wondering. 'Cause I'm not going be revealing any of that. But, I am going to be revealing the most amazing cider recipe ever, which, if used as directed, could have the effect of bringing you happiness, love and general pimpness.*

In keeping with my infomercial form, I'll continue. You know how most cider tastes like apple juice with pepper in it? And how it really isn't all that awesome but you drink it anyway because its Halloween and / or Thanksgiving and it's the festive thing to do? Well those days are over, kids, because, for just 3 easy payments of $19.99 (which I know you'll all be sending me asap), you'll recieve the secret to...

Kat's Amazingly Awesome Apple Cider.**

1 gallon of boring store bought apple cider
1/2 gallon of orange juice with pulp (the more pulp the better. And if you don't like pulp, then stop reading my blog because you are a nazi)
3Tbsp. Cinnamon
2 Tbsp. Ground cloves
1 Tbsp. Nutmeg
2 Cups of Bourbon (Really make sure you use a decent bourbon. No matter how awesome the base cider is you're going to ruin it if you stick Heaven Hill in it.)

Pour cider & orange juice into big pot, over medium/high heat. Bring it to a boil. I mean it. It needs to be doing some serious boiling. Ask a friend to confirm it is boiling because if it is not, you will screw everything up.

If you've gotten confirmation that you're boiling, turn heat down to low. If not, stop being so impatient, pick up a magazine and wait for it to boil.

Add cloves, nutmeg & cinnamon. Say "mmm this smells good".

Simmer for 10 or so minutes. Add bourbon. Drink.

Now, technically the recipe is over, but keep listening because you still have a couple of options. If you're anti-alcohol and / or serving this at an all ages gathering you can completely forgo the bourbon and replace it with 1/4 cup brown sugar. It will still taste fantamanastic. I promise. This is the way I make it every thanksgiving and everyone thinks it rocks face. Just be sure you don't add the sugar until it's boiling and let it boil for a few minutes after you add the sugar to make sure the sugar dissolves up.

On the other hand, if you're a freak of nature and just don't like bourbon but still want your apple cider to be an adult beverage, listen up. Kat's orginal recipe called for dark rum. This totally works too. It's not as good, but maybe it is to people who don't like bourbon, who knows.

Have fun, whatever you put in it.

*These statements have not been evaluated by the FDA.
**Some of you may have noticed that my name is not Kat. Good Job. You win. Seriously, you guessed it, this isn't my recipe. It originates from my most besterest friend in the world, Kat, and there's been very minimal tweaking by me. So if you ever see her, tell her she rocks.

Tuesday, October 27, 2009

Creole Scallops with Fried Pineapple Basmati Rice


So yesterday I was wondering through the grocery store aimlessly. I do that sometimes. You can see some pretty interesting stuff that way. For example, you might stumble upon two chicks making out in the frozen food aisle or you might find something as totally awesome as this. At any rate it can be entertaining and it's what I was doing when I stumbled upon, not lesbians suddenly sent into the throes of ecstasy by Pillsbury Toaster Strudels but something much bigger, much better. Something like.... wait for it.... keep waiting... something like fresh, cheap!, beautiferous..... COLOSSAL SCALLOPS!

This was an epic find because as some of you may already be aware, scallops are the prime minister of all seafood. Scallops are to seafood as the Great Pumpkin is to Halloween. Scallops are to seafood as Snoop Dogg is to rap. Scallops are to seafood as the Tanooki is to power ups. Scallops are to seafood as... yeah ok, you get the idea... unless you wanna practice for the SATs and then I can keep 'em coming. You just let me know.

Needless to say I was stoked about having some big ol ginormous scallops in my mouth. My first thought upon finding them was that I should *cue sultry music* deep fry those suckahs until they were a crisp, succulent golden brown, dip them in a tart little red cocktail sauce and cradle them in a warm bed of french fries. But then I remembered I was trying to lose some weight. So I started wracking my brain for inspiration. And I thought of the delicious Thai Food (a.k.a. the prime minister of ethnic food) I had had for lunch. And ba-da-ba-bing, just like good old House always does, I made a connection. Thus, I bring you....

Creole Scallops with Fried Pineapple Basmati Rice


1lb. Sea Scallops (it's important to make sure you get sea scallops. They're the big ones. Bay scallops look like mini marshmallows and they won't be as good in this)
2 Tbsp. flour
2 tsp. creole seasoning (if you want them hotter you can rock cajun seasoning instead)
1 Tbsp. oil (I like to use red chili oil. I'm sure regular ol' vegetable oil would work fine)
2 1/2ish cups cooked basmati rice
1 overflowing cup diced pineapple
1 Tbsp. chopped cilantro

Rinse off scallops to get the pungent seafood smell off of them. Pat dry.

Grab a ziploc bag and dump flour and creole seasoning in it. Toss the scallops around (2 or 3 at a time) in this floury bag. Pull them out and closely inspect to make sure they are good and coated. If they are, repeat process with the rest of your scallops.

When your scallops are all sufficiently coated in flour and spices, heat up some oil in a skillet. Add the scallops and cook over medium heat for about 10 minutes. Make sure you turn them regularly so that they get brown on both sides. You don't want a biracial scallop, after all.See, brown all around.

When the scallops are done, remove them from the skillet and set them somewhere warm (suggestions include: on a plate in a 175 degree oven, on a plate on a nearby burner, the tanning bed in your basement, the middle of the Sahara). Now, add rice and pineapple to the skillet. You may find it necessary to add some more oil or a little water to keep your rice from burning the h#!! up. If so, go ahead and do that. Stir this around for a while, making sure to scrape up and incorporate any good yummy brown bits that are stuck to the bottom of the skillet. When rice seems thoroughly warm, scoop it into a bowl, top it with a few scallops, then sprinkle with cilantro. And tada! Fin!

Sunday, October 18, 2009

Takin' it Back to the Old School: Chicken and Dumplings

First off, apologies to my loyal cornstarchers (apparently there are some of you, even if you never comment or subscribe) for the brief hiatus. As it turns out your favourite cornstarch obsessed chef passed the bar and has been in a bit of a tizzy leading up to and since doing so. Now, on to today's edition of our biweekly feature, Takin' it Back to the Old School. Today we feature one of the very first foods any decent southern / Kentucky gal learns to make - Chicken and Dumplings.

Once upon a time I was a wee young lass enjoying my first meal at Cracker Barrel. There, I quickly learned that dumplings were akin to mana from heaven. However, my mother quickly explained to me that Cracker Barrel dumplings were not, in fact, mana from heaven. On the contrary, she explained, they were kinda slick, flat and lackluster. Real mana from heaven, said Momma, didn't come from the Cracker Barrel; it came only in the form of fluffy, puffy, home cooked, made from scratch, Mamaw style dumplings. Sadly, Momma confessed, she did not know how to conjure this particular form of heavenly mana. Thus I took up the task of learning the fine art of puffy, fluffy, dumpling shaped mana conjuring.

My first attempt resulted in biscuits floating in broth. My second attempt yeilded something closely resembling Cracker Barrel dumplings. I went with this for a long while because I couldn't manage to conjure anything better and it still made me feel accomplished and like a real deal southern woman that I could make Cracker Barrel style dumplings. But then, one day, I decied to revamp and try again. The rest, as they say, is history. Bells rang, glitter flowed through the kitchen, a chorus of angels appeared at the dining room table. I had done it. I had made a gianormus, nomalicious pot of perfect, fluffy, yumtastic dumplings. And because I am a charitable person, I shall now share with you the secret to conjuring fluffy, nomtastic, fabalicious, dumpling-shaped mana from heaven.

Old School Chicken and Dumplings; or Fluffy, Carby, Mana from Heaven

1 chicken (or assorted pieces of chicken, e.g. 5-6 chicken breasts)
1 stock pot full of water
3 normal sized cans of chicken broth
1 family sized can of cream of chicken soup
6 cups of white flour
3 Tbsp. baking powder
1 Tbsp. salt
12 tbsp. soft margarine or butter (i.e. 1.5 sticks)
3 cups of milk (or more)

First, put the chicken in the stock pot. Cover with water. Boil for a long time. Like 2 hours. Or longer. Whatever. It doesn't really matter, as long as the chicken isn't raw anymore. And it can even be raw if you like Salmonella poisoning.

Now, remove the chicken from the pot. Use a fork to pull all the meat off the chicken bones. Put meat back into the pot of greasy water. Put bones in a ziploc to save for use in a voodoo ritual. Dump the broth and cream of chicken soup into the pot of chicken and greasy water. Return the pot to the stove and put it on simmer.

While that does its thang, dump flour, baking powder and salt into a BF bowl. Cut butter into little bits. Add to the floury mess in the bowl. Use a knife or fork to cut the butter into the floury mess. This takes a long time and is tedious, but you can do it. I have faith in you. And only if you do will you get to experience the chiming bells, glitter rain and chorus of angels. So really, buckle down and do it. And then, when you think you're done, wash your hands, dry them off, stick them in the flour mess and feel around to make sure there are no big clumps of butter. If there aren't feel free to reward yourself by booking a massage, spa day or the services of a professional escort before moving on to the next step. If there are, call yourself a slacker and get back to work.

Once you're clump free add in the milk. Use your hands to glop the flour and milk together until it looks like a dough ball. If it's crumbly add more milk. If its too gooey and has the texture of mucous, add more flour. If it's just right, pick up your doughball and approach your stockpot. Start pinching off little narbles of dough. Drop them in the stockpot.

Don't wig out about what size of narble to pinch off. There is no perfect dough narble size, it all depends on how big you want your dumplings. I probably would not recommend baseball sized dumplings, nor m&m sized dumplings, but really it's all in what floats your boat.

Once you've dropped all the dough in the pot, poke it with a spoon a bit to make sure all the doughy bits are at least wet with broth. Cover, simmer for about a half hour. In about a half hour you should see the chorus of angels and glitter rain. But even if you don't your dumplings are still probably done, so take them off the stove, ladle them into bowls and serve to family and friends. Sit back and enjoy all the awesome compliments you get.